
My name is Peter Hanson, and I teach an elective class at Aspen Middle School for seventh graders called Think, Make and Improve (TMI). It’s a class I created two years ago to expose students to programming and building with electronics. Before creating TMI, I taught everything from high school physics to 7th-grade math. I am not a computer scientist or electrical engineer, but I do have a passion for electronics. As I spent more time teaching core subjects, I started noticing a disturbing trend in my students away from creating and toward producing products with minimal personal pride or emotional attachment. Thus began a journey that I hope to share with you here.
Falling Down the Rabbit Hole
The idea for the course started many years ago after I read an article in Wired magazine about Arduino and how it brought together the seemingly disparate fields of art and programming. To investigate further, I purchased an Arduino starter kit, but I couldn’t get kids interested as the programming piece seemed to turn off my middle school students.
While researching the proposal for my class, I read and reread Gary Stager and Sylvia Martinez’s book Invent to Learn, purchased SparkFun’s (RedBoard) Inventor’s Kit, Birdbrain’s Arduino-based Hummingbird and Adafruit’s Circuit Playground Express. I attended the Constructing Modern Knowledge (CMK) summer conference, and there I met what I knew would be the best microprocessor for my students, the micro:bit.
A Solution, At Last!
Learning about the micro:bit solved two of my most immediate problems. First, my school is a Chromebook only school so I wasn’t able to download the Arduino programming environment and the web-based workarounds I tried at the CMK conference seemed unworkable given the day to day life of a middle school teacher. Second, the programming environment (Microsoft MakeCode) was block-based, so kids transitioning from Scratch would feel comfortable. Furthermore, as Gary Stager demonstrated, with a few lines of code, students could have a beating heart graphic along with scrolling text. The simple graphics and text capabilities moved the micro:bit ahead of Adafruit’s Circuit Playground Express. Now came the search for a curriculum that would help this little wonder come to life in the classroom.
Finding the Right Educational Material
An Internet search yielded two choices for educational material for the micro:bit. First, was Kitronik, out of the UK, and second was SparkFun, out of Colorado. Each company’s educational material had advantages. Kitronik’s Inventor Kit came with a hard copy instruction manual and a tutorial on making a motor run with the micro:bit (something I knew kids would want to do). The SparkFun Inventor’s Kit for micro:bit’s instructions were online, which gave students the option of copying and pasting the code into MakeCode, and included large graphics that showed how to build the circuits on a breadboard. SparkFun’s Inventor’s Kit for micro:bit also comes with lots of electronic components to make the students’ project great.
In the end, I chose to use the SparkFun Inventor’s Kit for micro:bit.
Introducing SparkFun’s Inventor’s Kit for micro:bit to Students
My TMI class only lasts a quarter, so I was able to try things and improve my craft over the course of a year.
In the first quarter, the projects went as planned and students produced some interesting “fidget devices.”
However, in the second quarter, I had a much tougher group of seventh graders who lacked motivation to produce anything on their own and classroom management became challenging.
That’s when I knew the pedagogical framework from CMK and the stock curriculum from SparkFun would need a bit of refinement if my new class was to be a success. Specifically, kids had trouble building circuits on the breadboard and the many alligator clips (students love to pull the plastic piece off the metal clip) laying around the tabletop invited too many short circuit possibilities for me to feel comfortable.
Thus, in January I started designing something I call the micro:bit Dashboard.

The micro:bit Dashboard
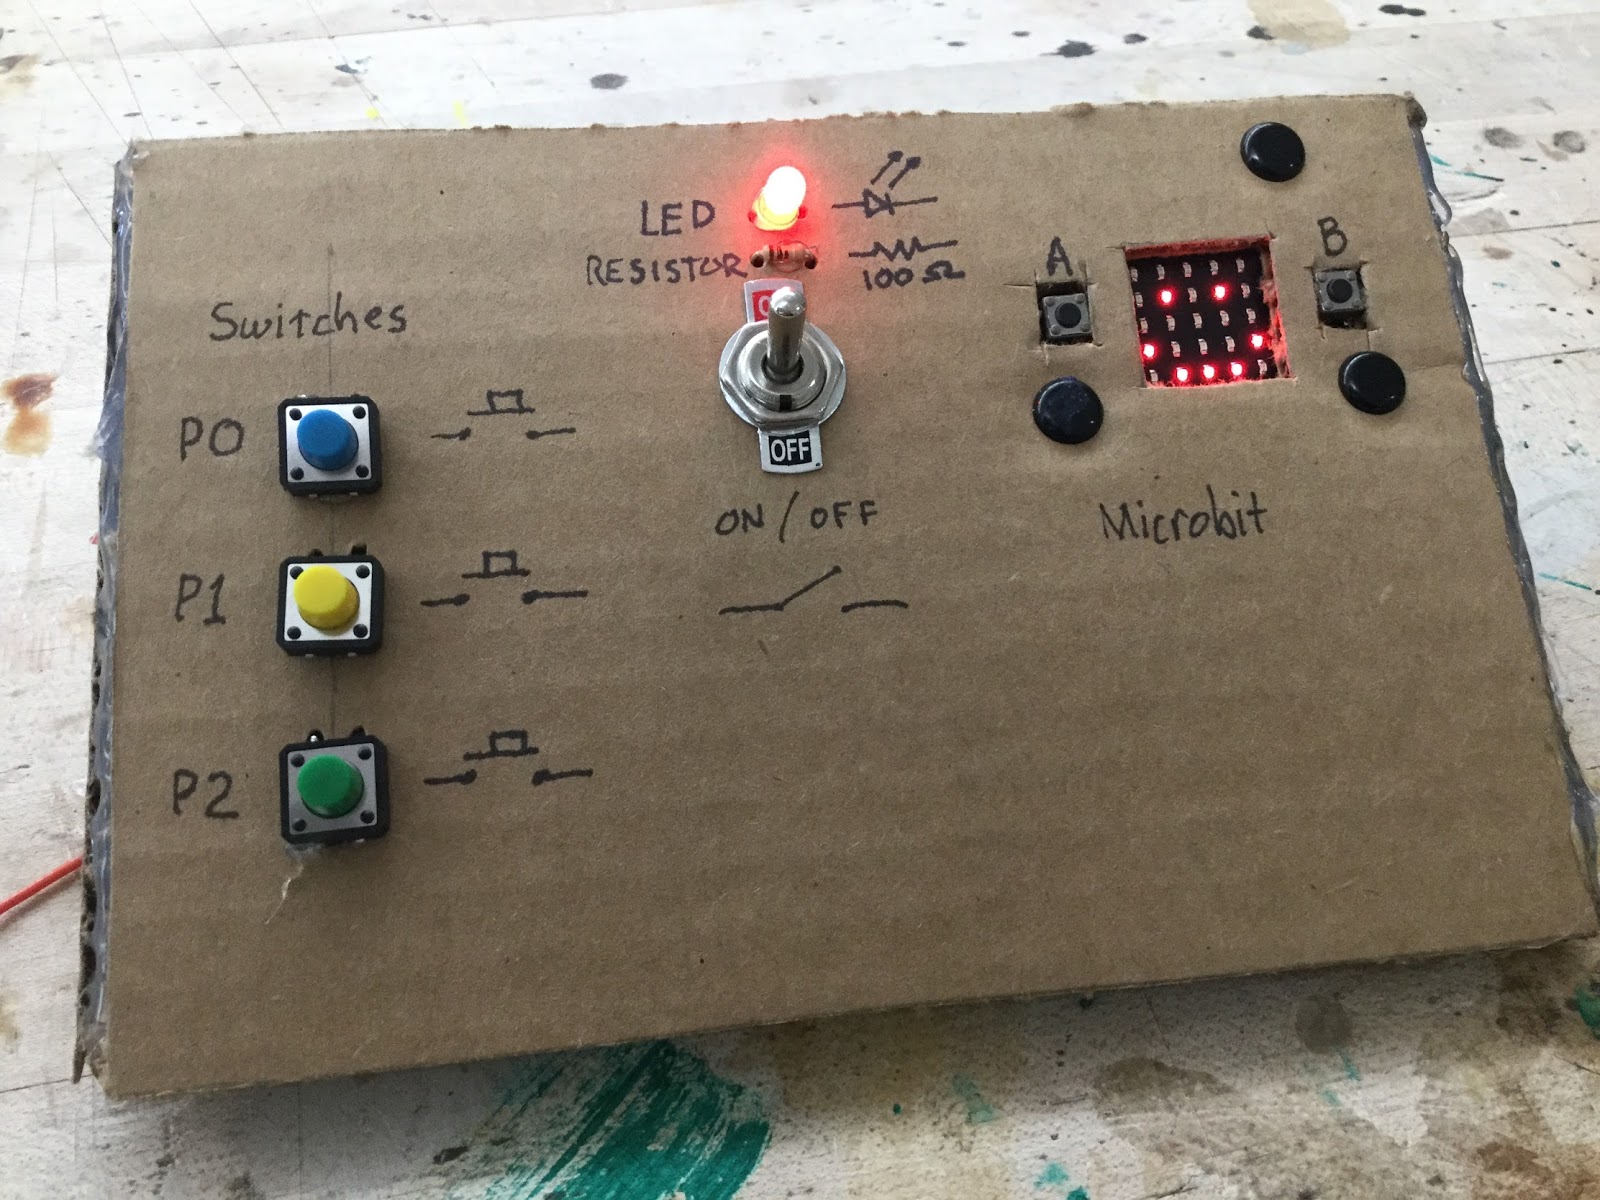
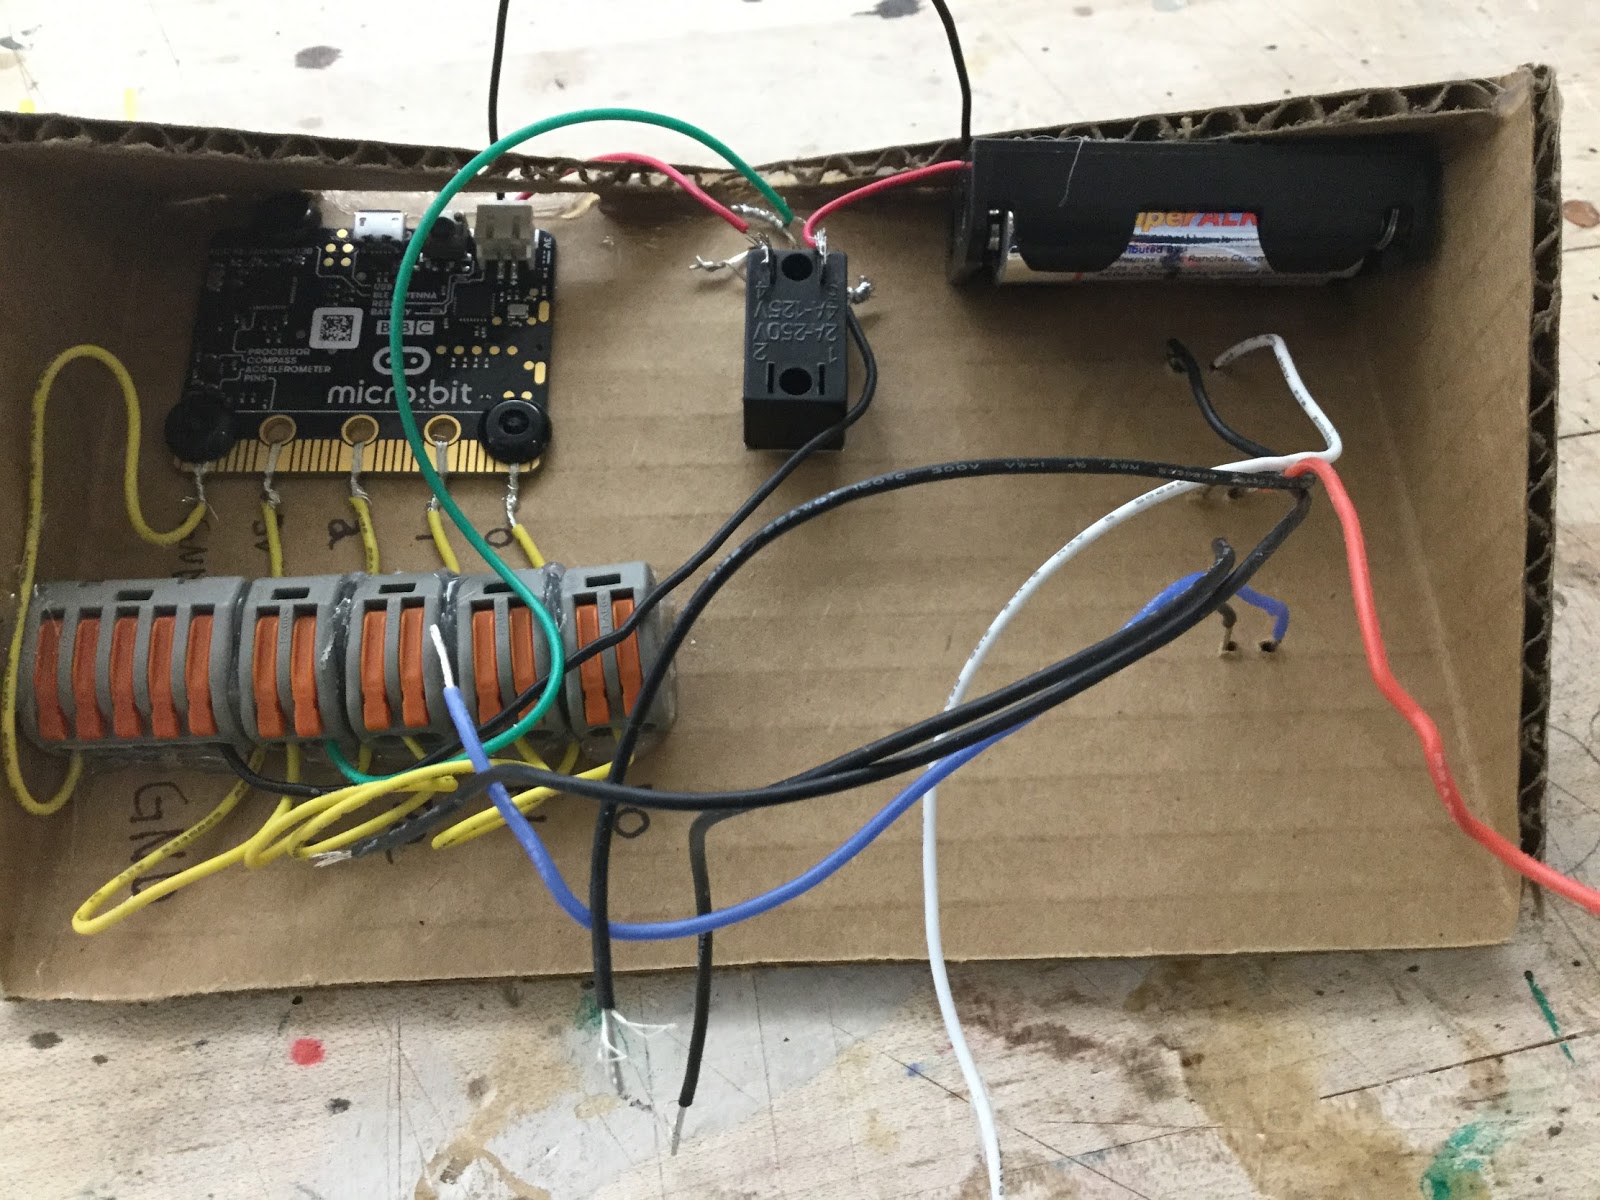
The idea of the dashboard is to remove the need to build circuits on a breadboard while still allowing students the opportunity to learn about circuits and programming.
|
|
The dashboard in its final form is shown above in a couple of photos. Building the dashboard gives students a chance to work with cardboard construction, develop soldering skills and construct a single unit that they use to easily access P0, P1, P2 and attach various outputs quickly via the Wago snap-connectors on the back of the dashboard.
Building the dashboard takes a couple of weeks (I see the students every other day for an hour), and then the rest of the quarter is dedicated to programming the micro:bit using inputs from the on-board buttons and sensors, as well as the easily accessible buttons on the front of the dashboard.
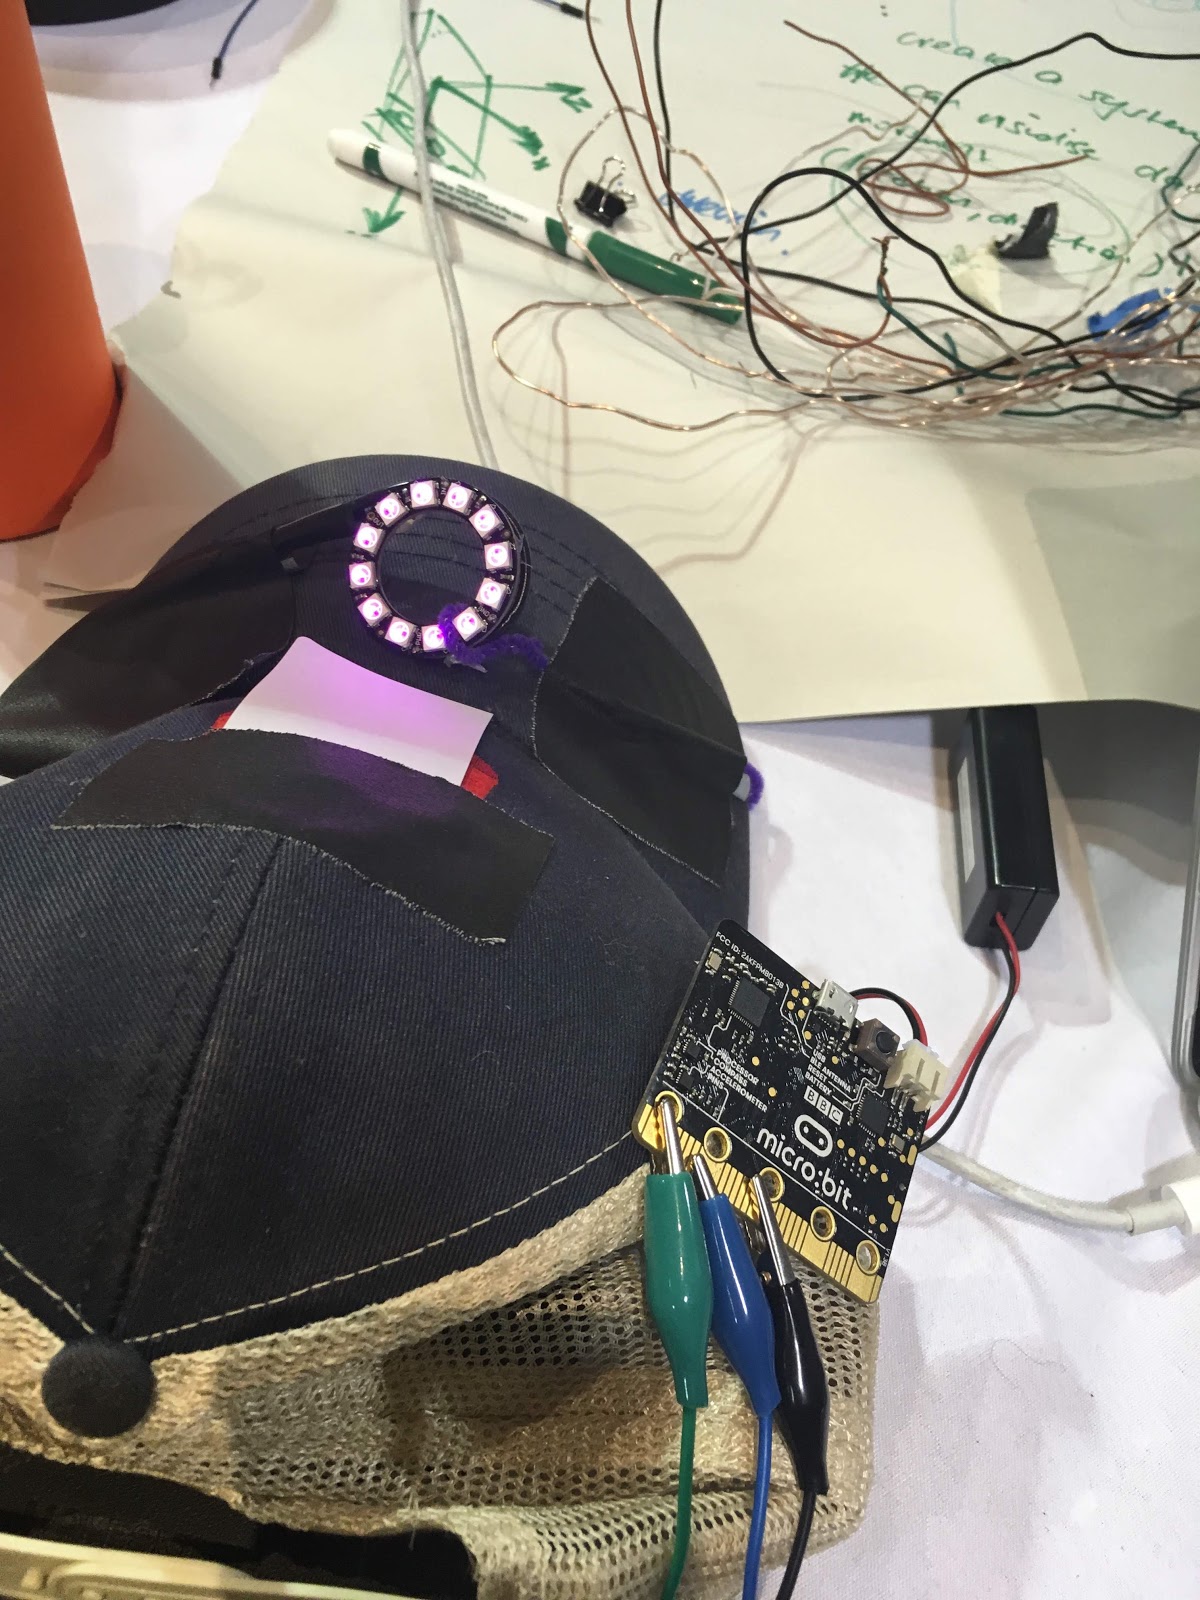
The snap connectors on the back of the dashboard make it easy to connect the hamburger speaker (SparkFun) for sound, buzzers and 12 element Neopixel rings (Adafruit). And while not exactly the open-ended, student-centered approach promoted at the CMK conference, it does give students a skill set that is utilized in eighth grade when they have more freedom to “use electronics as a medium” and produce their own creations.

Year 2 with micro:bit
Now, as I’m starting my first micro:bit year 2 class with eighth graders, I’m seeing great things. In this eighth grade course, I build on their programming skills from 7th grade and return to the breadboard as the students seem to have a bit more dexterity and patience. So, we abandon the dashboard and follow the Sparkfun Inventor’s Kit for micro:bit curriculum almost exactly, but with some additional input devices. At the end of the course, I turn them loose to create something that has meaning to them and uses electronics as a medium of self expression.
Some of my most challenging students from last year, seem genuinely interested in hooking up potentiometers to buzzers, LEDs and motors. They’ve inspired me with new circuit designs, as only middle schoolers can. (One industrious group that thought up using the on/off switch to first illuminate a red LED and then a blue one as they moved the switch, all while having a buzzed scream, was a great triumph of kid thinking.).
Currently, the students are revisiting their micro:bit lessons from last year, but building the circuits on the breadboards. Next, I will introduce them to a variety of analog inputs (potentiometers, joysticks, external thermometers, piezoelectric generators, motors as generators, the onboard accelerometer, pressure sensors, ultrasonic sensors, etc.). Next, I’ll show them how to hook up a motor using a transistor and external battery and remind them of all the other output options they’ve learned about. Finally, I’ll turn them loose to create something that will demonstrate their knowledge of electronics and the micro:bit, all while “using electronics as a medium”.
|
|
Final Thoughts
The SparkFun Inventor’s Kit for micro:bit is a fantastic collection of electronics components, the online instructions are amazing and the tech support crew is always helpful. Of all the electronics vendor, SparkFun seems the most committed to supporting K-12 education. Furthermore, SparkFun’s Essential Sensor Kit offers a wonderful collection of analog inputs for the micro:bit and makes a great expansion for the Inventor’s Kit.
teaching tools, Guest Post, micro:bit, helpful information