The micro:bit has made a huge impact on getting "quicker to awesome" in the classroom. From third grade to high school and beyond, it has proved itself to be a platform that is easy to learn and prototype projects on. But sometimes there is that one thing that sometimes just causes you to stub your toe. For many people that is the radio functionality that comes natively on the micro:bit.
If you have two micro:bits sitting around, grab them and join me in this post to take a closer look at how to set up the radio for communication and how to send data from one micro:bit to another. Ready? Good! Here we go…
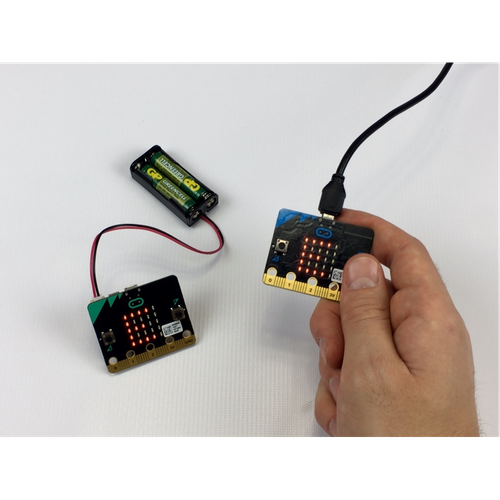
First of all we are going to be using Microsoft® MakeCode to program our micro:bit! Head on over to makecode.microbit.org!
The radio is native to MakeCode, which means we don’t need to add anything and can just start working with the blocks that are already at hand. You should have just the basic On Start and Forever blocks in your coding area.
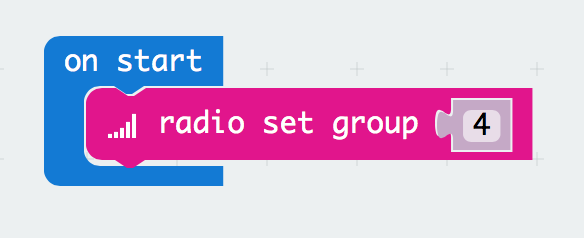
Now, the first thing that most people overlook when they are exploring the radio and get hung up on is assigning a group ID to your micro:bit(s). You do that by using the Set Group (#) block. This is the same thing as setting your micro:bit to a specific channel. For two micro:bits to communicate with one another, they need to be on the same channel. This is often overlooked when you are doing this for the first time. For example, we set our micro:bit to group 4. All micro:bits that we are planning on communicating with should be assigned the same group # in the On Start block.
Now that the micro:bit channel is set, we are free to send data out over the radio. Any data that is sent can be heard by any other micro:bit that is on that channel. So, if we were to send the number 3 over the radio on group 4, all other radios on group 4 could receive that number and do something with it.
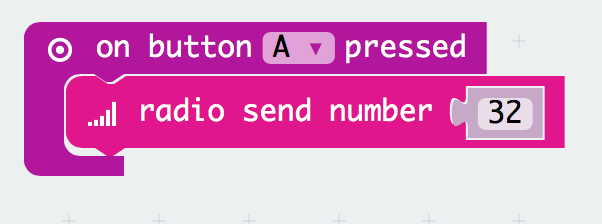
For this basic program we are going to use a button to trigger sending some data. When we press the A button, we want to send the number 32 over the radio as shown in the screenshot above. Download and save that to a micro:bit. This will act as your transmitter, or “remote.”

Next we need to program a micro:bit to do something with that information. Grab a second micro:bit and change your program slightly. This time remove your button press event and replace it with an On Radio Received block. This event block will be triggered any time a number is heard, or received, over the radio on group 4. This is a great start, but what if we are looking to trigger something on a specific number coming over the radio? Well, we can do that.
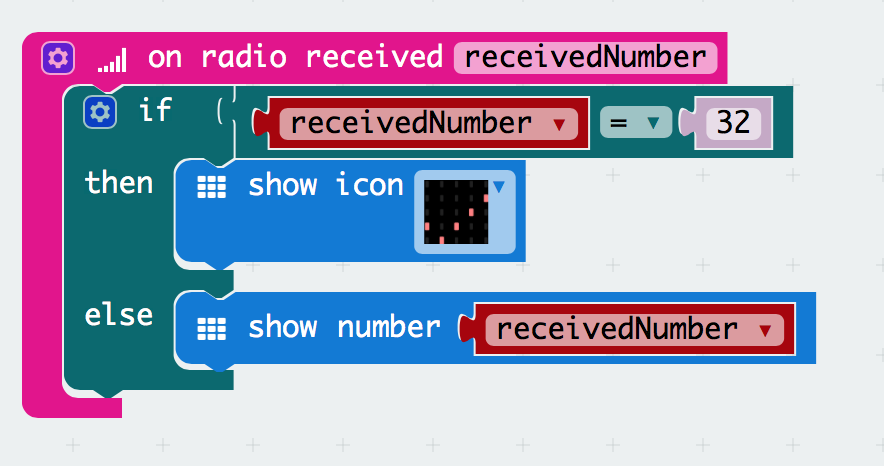
We are going to grab an if / else block to use some basic logic and compare whatever number we get over the radio to the one we are expecting to get, in this case 32. The magic here lies in that once you pulled the on radio received block in it populated a variable block under your variable drawer called receivedNumber. This variable stores whatever number the micro:bit receives over the radio. We use that and compare it against 32. If that variable is a match then we have the LED array show a check mark. If it is any other number other than 32, we then display the receivedNumber on the LED array. With that download this second program and save it to your micro:bit.
Finally, if you power both micro:bits and press the A button on your first micro:bit, the LED array on your second micro:bit should show a check mark. If you change the code to send any number other than 32, the second micro:bit should show that number scrolling across the LED array.
With the basics under your hat, you can now dive into the details of sending data through radio. For example, with the knowledge that all micro:bits on a specific group are always listening, you can have multiple micro:bits respond to a specific number in our case, or any other piece of data at the same time. This is a great way to teach basic networking without having to teach about a network stack, do a bunch of setup, etc.
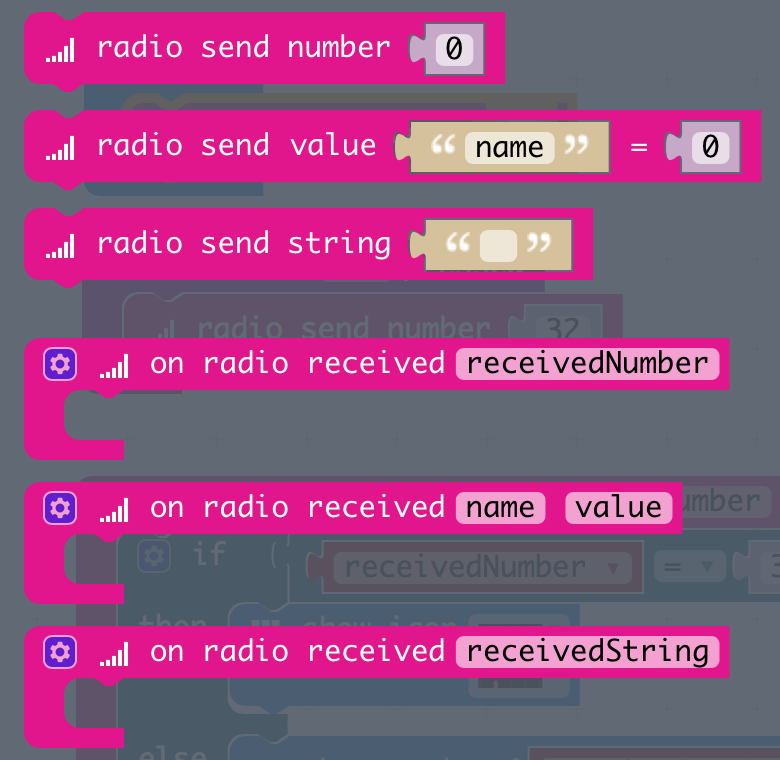
You can also send data in different formats! You already saw how you can send and receive a number. If you take a quick look at the radio blocks, you will notice that you can send and receive a string, which is basically words and phrases or a string of characters. You can also use a name:value pair. A name:value pair allows you to essentially add a label to a piece or value of data. This is really nice when you have a lot of different pieces of data being sent out by multiple micro:bits on the same group.
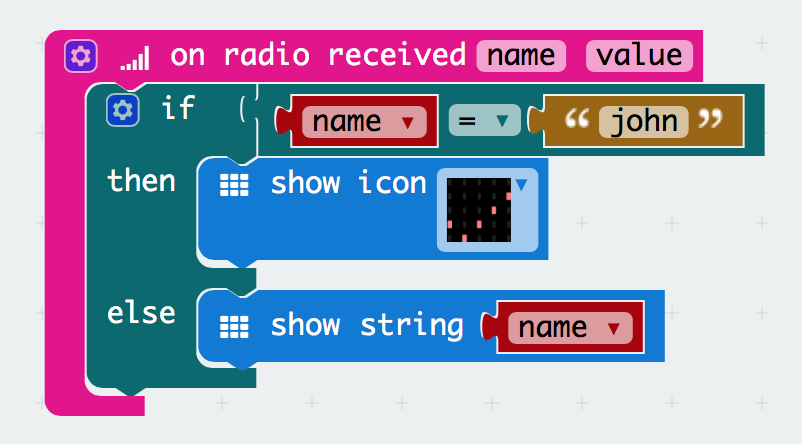
Finally, with all of these different formats of data that you have at your disposal, you also have the variables that become available when you add their blocks to your program. So when you want to check for a specific name:value pair, you can actually use an if statement to check a name against what you are looking for. In the image above we checked the name variable against what we were looking for (“john”), and if they matched we had the LED array show a check mark.
Now, this is only skimming the surface of how to use the radio on the micro:bit, and I am sure that you are now cooking up some really cool projects to try out with your students. I can tell you this much; it has never been so easy to teach and use wireless communication with students. Let us know how you're using the micro:bit in the comments below!


micro:bit, programming, computer science, STEM