
We recently launched a new line of products that make it easy to add sensors, buttons, LEDs and more to the micro:bit with alligator clips. This ecosystem includes the gator:bit, gator:starter, gator:control and gator:color. Let’s take a few minutes to explore the gator:bit. You can learn more about each of the other gator:boards in this blog post.
What is the SparkFun gator:bit?
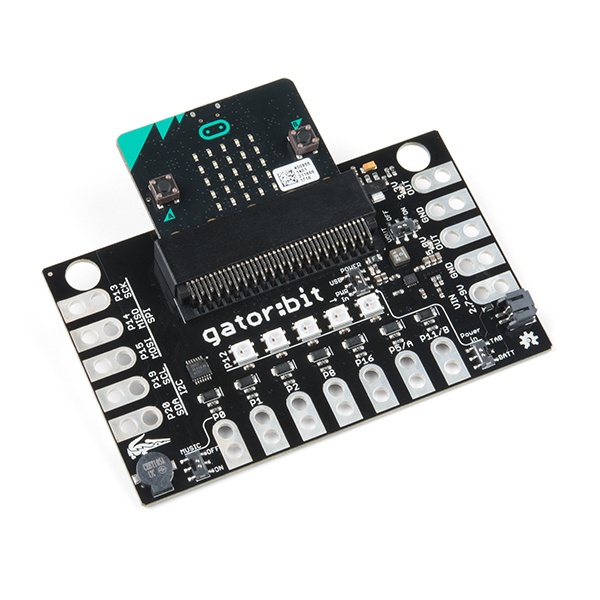
The SparkFun gator:bit is an all-in-one “carrier” board for the micro:bit that provides a fully functional development and prototyping platform. Almost every pin on the micro:bit is broken out to larger, alligator clip-friendly pads on the gator:bit, making them easy for smaller hands to access. The gator:bit’s built-in circuit protection and flexibility make it safe for kids to use, while providing the reliable, budget-conscious longevity you need in the classroom.
Getting Started with the SparkFun gator:bit
To get started, let’s take a look at an overview of the gator:bit and everything on the board.
Next, let’s take a look at how to power the gator:bit for maximum results.
And now, let’s explore the addressable LEDs found on the gator:bit board.
Interfacing with Traditional Electronics
If you want to connect traditional electronics to the micro:bit, the gator:bit also has you covered there. In this final video, we take a look at how to use alligator clips with pigtails to connect the gator pads to your desired electronics.
Want to see all the gator:board videos in one place? Check out this playlist we made for you.
micro:bit, helpful information