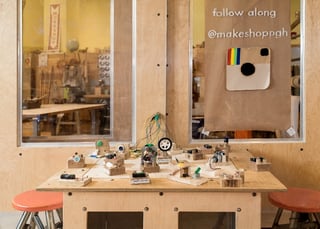
 MAKESHOP, an exhibit space at Children’s Museum of Pittsburgh, is a hands-on learning lab for families. One of the most popular activities is circuit blocks — individual component pieces that can be connected via wires to create simple circuits and explore the basics of electricity.
Since 2011, MAKESHOP has been open to the public nearly every day, from 10 a.m. to 4:30 p.m. In that time, the staff of teaching artists and educators have learned a lot about designing STEAM activities for all ages. Here are some of their top take-aways.
Design Constraints for Working With Young Learners
Adults often underestimate the extent to which young children can engage with or understand electronics. While they may not be calculating resistor values yet, kids in pre-K and kindergarten are already working on developing skills such as:- Understanding cause and effect (disconnecting the wires turns off the fan)
- Identifying patterns (these pieces all have one red wire and one black wire)
- Extrapolating understanding (if this buzzer works when I connect the wires, maybe the LED will also work if I connect the wires)
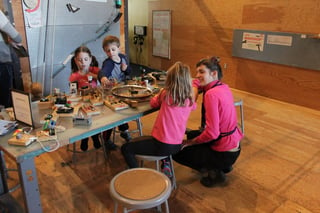 That’s not to say that there aren’t some difficulties in helping young learners engage with electronics. For example:
- Their fine motor control is still developing
- They may only be able to focus on or plan one or two steps into the future
- The unfamiliar or hidden can be difficult to understand or contextualize
But all of these can be made into design features! Each learner in our space is going to come in with different abilities and background knowledge. We want to be as flexible as possible to allow them to engage in an activity at a level that challenges, but doesn’t defeat, them. Below are some of our tips for making circuitry accessible.
Eliminate Unnecessary Complications
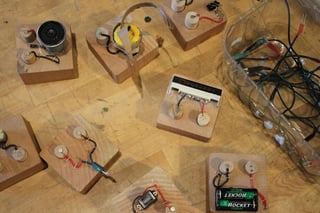 When we originally began prototyping our makerspace, we thought that it would be our exhibit for the “big kids,” ages 8 and up. We quickly came to realize, however, that many of the big ones also attend with little ones, and the older learners are busy working hard in school much of the year. The younger kids we were seeing were struggling with the complexity of attaching wires. Was the point of the activity to learn how to open an alligator clip? Or did we care more about exploring the connections between components?
Our favorite solution has been incorporating magnets. By eliminating the need for pinching alligator clips or precisely placing a clip onto a terminal, our blocks suddenly became far more welcoming to young children. As a side benefit, this solution also opened them up to use by others, such as grandparents with arthritis, visitors with underdeveloped muscle tone, or even the occasional kid in a cast who is having a hard time coordinating the non-dominant hand.
Now we have an assortment of blocks, both magnetic and otherwise. Older visitors and those looking for a bit of a challenge can work with more delicate pieces, while novice or beginner electricians can focus on creating connections instead.
Don’t Hide How it Works
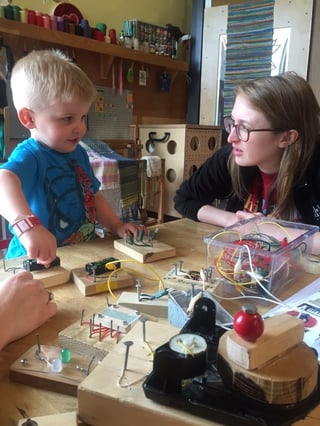 For kids just being introduced to the idea of a circuit, seeing the physical connections between components is a critical part of understanding how electricity is able to travel from one piece to the next, since it’s otherwise invisible to the naked eye.
Because connection points are often also points of failure, commercial products and kits sometimes hide or embed wiring in a way that can make it invisible or inaccessible. When we build out circuit blocks, we like to keep as much in plain sight as possible, to allow visitors to be able to “trace the path” of electricity by pointing directly to the wires and where they connect to other pieces.
Once understanding is developed — that a wire or other conductor must be present for electricity to travel — the learners can begin to form mental models that incorporate this fact, such as hypostatizing there could be wires and batteries inside a favorite toy. But until they’ve been able to test and examine these connections firsthand, it might as well be elves making that cool plastic helicopter light up and spin.
Plan Mechanisms for Repair
We’ve got exposed wires and small, uncoordinated hands, not to mention tall tables and hard floors. It’s no wonder we’re frequently fixing our blocks! A drop-in museum exhibit is a specific type of environment, and not one where everybody feels the need to tidy their space before going to lunch. But no matter how much time a classroom spends practicing being good citizens — sharing, being gentle, putting things back where they belong — there will, inevitably, be a moment in which something is dropped, yanked, misplaced, stepped on, or otherwise treated roughly. I can’t recommend more highly to design with this in mind!
A huge benefit of building blocks ourselves is that, well, we know we have the tools and expertise to fix them! We built them once; we can do it again. And the simplicity for which they were built means that it’s often only the work of a few moments to fix them by stripping a wire or rehammering a nail into place.
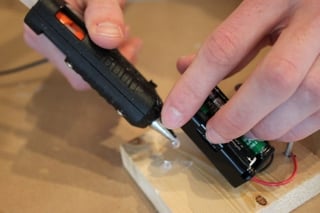 Teachers are rarely afforded the time to fix broken objects during school time. So why not create a learning opportunity and allow kids to create, fix and repair the blocks? We’ve seen a number of schools in which older students who have already spent time becoming familiar with basic circuitry are challenged to create or maintain the blocks used by the younger kids. Along with building a culture of sharing and supporting one another, it forces older students to think critically about design, intention and problem solving. Throw in some focus on the process (ideation, iteration, prototyping), the math (measuring), the writing (instruction booklets) or other aspects of the project, and there’s no reason it can’t support, rather than draw resources from, existing curriculum.
There’s also a lot to be said for parent volunteers, an after-school electronics club, or other way of making the maintenance of tools a part of the everyday structure of your learning environment.
Every Experiment is Worthwhile
Part of the benefit of designing and building our circuit blocks — often with visitor help — is that we are able to stress the process of creating something that is intended to be used in certain ways. If somebody finds a creative new way to use it, that’s awesome! If they’re baffled by it and struggle to make sense of what they can use it for, that helps us make it better. Good ideas are worth testing, and feedback is worth listening to. While the teaching artists in MAKESHOP are working on developing tools and activities to engage family visitors, students can practice empathy and design thinking through listening to their peers who will use the pieces they’ve created.
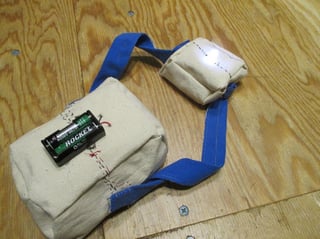 Here are some of the experiments we’ve tried, without great success (in our context...your mileage may vary):
- Using alligator clips that are all the same color, which confused parents who were looking specifically for red and black wires
- Using only two different colors of alligator clips, which confused kids who saw components like holidays lights with green wires
- Creating different storage systems for the alligator clips, such as bins, “trees” or hooks, but our visitors often get distracted before putting things away, no matter how we store them!
- Creating soft-circuit blocks made with conductive thread, which were hugely time consuming to create and difficult to fix
Some of the strategies that have worked well (for us) include:
- Using familiar and repurposed materials, like old CD players and binder clips for switches
- Spacing the terminals at different distances to avoid accidental short circuits
- Using shorter alligator clips that won’t get tangled, and are easier to trace the connections between
- Using magnets!
- Having a variety of shapes, sizes and textures of wood for our blocks, which makes them appear homemade and inspires visitors to imagine creating their own
Age, interests, length of engagement, prior knowledge and many other factors go into determining what will suit your learners' needs. Don’t be afraid to try new things, and don’t be afraid to nurture a culture of constructive feedback and tinkering to get your learners involved in the process!


teaching tools, Maker Education, makerspace, Guest Post, helpful information, basic circuits