
I am a huge fan of both Arduino and Raspberry Pi. Each has its strengths and its weaknesses.
The Pi, as has been well documented, is a full operating system and is a capable platform for connected devices and as a small server or even a stand-alone programming environment for Python.
But what about combining them?
Recently I’ve been working with some schools that are doing robotics with the Pi and I have started to look at the pieces that cause me to say ”I wish I could do this in Arduino!” then I thought “Why not do it in Arduino?”
This blogpost is the result of my exploration.
Installing Arduino on Raspberry Pi
The first thing I did was install Arduino on the Pi. This is a pretty straight forward command line install.
Open the terminal and type in “sudo apt-get install arduino”, and hit enter.

You’ll get a whole bunch of script and then a prompt asking if you want to continue….you do, so hit “ y “and enter.
When the install is done, it will kick you to that top of the directory and you are set to go. Next click on the Raspberry icon in the task bar and select the “programming option”. You should see the Arduino option as a selection. Alternately, you can type “arduino” into the command line and it will start Arduino.
Next plug in a board and test it out with, of all things, blink. When you go to find the port you will get a “/dev/ttyUSB0” or something approximating that. Go for it, hit “ctrl + u” and see if the magic happens.

Assuming that you’ve got Arduino running on your Pi (congratulations!) let’s get a sensor working on our rig. I’ll wire a simple pot to pin A0 and test for a serial print of the output.

Now I’m going to add a simple serial read sketch:
void setup()
{
Serial.begin(9600);
}
void loop()
{
Serial.println(analogRead(A0));
delay(350);
}
Let’s upload this code to your Arduino and test it to see that it runs. Open the serial monitor and when you turn the potentiometer, you should see the numbers change.
When you select the port and and the board before uploading, note the port designation, it will show up later.
Now for the Python
Let’s take a look at the Python side of things. Raspberry Pi has the distinct disadvantage of not having an analog to digital converter on board, but Arduino does, so let’s use it to get some analog data into a Python script.
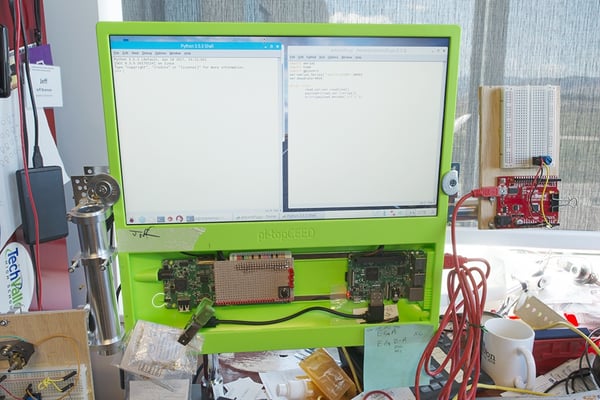
When I open the Idle environment for Python, I’ll get the shell, the shell is an engine for running code and getting terminal results from programs actively running.
Before I can get serial communication going in Python I need to install a ‘module” similar to a library installation in Arduino.
Open the command line and type in “pip install pyserial”, this will trigger a short install and when you return to the prompt line in the terminal, you should be good to go.

Python code
Let’s take a look at the Python code to run our script.
I’ll open a “New” file in Idle and paste in the following code:
#####Start code
import serial
import time

ser=serial.Serial("/dev/ttyUSB0",9600) #change ACM number as found from
ls /dev/tty/ACM*
ser.baudrate=9600

while True:

    read_ser=ser.readline()
    payload=(read_ser.rstrip())
    #payload.rstrip()
    print(payload.decode('utf-8'))
    time.sleep(.250)
#####End code
My import calls at the top grab the modules “time” and “serial” that will give me serial functionality and the ability to slow things down a little.
The first block of code after the import calls an object which I call “ser”, I could call it whatever I like, but “ser” is related to what it does, serial communication. An object can be thought of as a variable that stores not data, but some kind of action or functionality. I also notate the object using dot notation to attach specific commands and requests to the larger object. Derek, one of our longtime employees, uses a dog analogy that I’ll borrow.
We all know a dog, there are similarities that make up all dogs. Dog traits are their attributes dog.eyeColor() would return the eye color, or you can set it. There are also commands or actions a dog can make... dog.sit() or dog.bark(). These are called methods. When we create a dog object we instantiate it and set some of its attributes. In the case of your serial object... you name the object "ser" and set its port and baud.
Notice here that our port is set to the port that my Arduino is on? If your Arduino port shows up differently when sending code to your Arduino, change this port designation to reflect that port in your Python code.
The next line allows us to list the ports to see where our Arduino is getting and receiving data from. Finally we attach a baud rate to our serial object with ser.baudrate=9600.
We use a while loop and in the loop we set our read(“ser.readline()”) equal to a variable we call “read_ser”. Then I strip out white space from the stored data with “read_ser.rstrip()” and store the result in a variabe called paylaod. I could restore it in “read_ser” but two different variables allows me to print each separate stage and compare the results.
The print statement uses a “decode(‘utf-8’) instance to put everything into a character-readable format from it’s numeric-based transmission format.In short, it makes it human-readable.
The last thing I do is put in a “sleep” command to slow things down and make it a bit less frenetic.
Putting it all together
I will have to save this code before I can run it, so once it’s saved, click the “run” option or hit F5 and the shell should run your code.
If all went according to plan, there should be a stream of numbers in the shell that corresponds to what the Arduino is reading from the potentiometer on pin A0.
Wrapping it up
This is a good start and you can play with this code to send text. In my next post, I’ll setup Turtle and Tinkter, the Python graphics modules, to import the data into visualizations.
Please feel free to use the comments to ask questions and let us know how this works for you.
Arduino, python, computer science, raspberry pi