The number one question I get from classroom teachers after “Where do I start?” is “What language should I teach?”...and then “Well, then does X platform or board support that?” These questions are the largest stumbling blocks for teachers looking to implement maker education through hardware in their classrooms. I am going to break down some of the answers that I have given, as well as some observations I have made over the past few years.
Start Small and Then Let Application Drive Your Decision...
What do you envision your students doing with hardware? Are they making their invention prototypes move, blink and buzz? Are they building robots? What about connecting projects to the Internet and exploring the world of Internet of Things (IoT)? There are a lot of choices, and your first inclination is probably to try to find something that does everything and includes all of the bells and whistles. Resist the temptation!
Start with a flexible but focused hardware set — our SparkFun Inventor's Kit (SIK) or SparkFun Tinker Kit (STK) are perfect places to start. Arduino is a perfect platform for flexibility without being overwhelmingly open. Many of the concepts that you and your students learn from the previously mentioned kits apply across the board to a number of applications.

Once the basics are mastered, or at least covered, the flexibility of Arduino will empower you to dive deeper into different subjects. Arduino Shields are a great way to easily build and program for specific applications. If you want to build a robot, there is a shield for that. If you want to use Vernier sensor probes, there is a shield for that. If you want to play around with anything and everything, there is even a shield for that.
This year we are working on a number of other products that will help you branch out into other focus topics from the SIK or the STK in your classroom, so keep your eyes peeled!
Gotta Keep 'em Separated…
You don’t always need to start with hardware. In fact, we recommend NOT starting with hardware but rather easing your students into it from the software side of things. If you are planning on using Arduino in the classroom, we have found that learning the Arduino language as well as building circuits at the same time can be a little overwhelming for your students, not to mention the teacher having to help debug all of those circuits and code errors.
We recommend starting with Processing. Processing is the mother language to Arduino. It is free, open source and doesn’t require any hardware other than a computer to get started. Processing is used to create multimedia art and desktop applications on your computer. The great thing is that it is related to Arduino, so its syntax and structure are very similar. Even the IDE window looks similar. A week or two in Processing before starting with Arduino is worth its weight in gold in the grand scheme of things. If you are looking for a good place to start with Processing, check out our Processing HotSheets or pick up a copy of The SparkFun Guide to Processing. Both the HotSheets and the book come from classroom materials from my time teaching both Arduino and Processing in my classroom. A great final project for your students is to build a project that uses both Arduino and Processing together.
Shorten the Time to Awesome…
A teacher's first mistake when teaching Arduino and embedded electronics is to take the standard route of teaching how they were probably taught about electricity and electronics: what is a circuit, Ohm’s Law, resistance, capacitance, voltage...blah, blah,
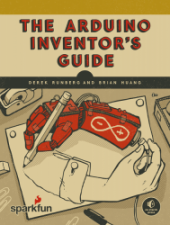
We ask you to shorten the time to awesome. Get your students building circuits, programming, designing and implementing cool things first. Get them excited to be working with wires, components, code and circuit boards. Show them what can be done with all of these parts and let them ask the questions that will lead to teaching theory. Context and physical projects that take electronics off of the breadboard and into real life are key to this point. Check out The Arduino Inventor's Guide, which is our upcoming book about doing just that: building awesome projects with our SIK, combined with cardboard, popsicle sticks and hot glue or tape.
Don’t worry about missing out on theory. If you are doing it right, your students will ask questions about why and how on their own. They just need to see it happen first; they need to get their hands dirty. Theory can wait for later...pass that on to the next teacher, the next school. Don’t worry; they will get it soon enough. I have taught an entire semester of Arduino without even mentioning Ohm's law.
In Closing…
Start small with the basics — maybe a Tinker Kit — and expand outward from there. Take some time with code and check out the Processing HotSheets. Finally, don’t beat your students over the head with theory. Teach them to build, be creative and solve problems with their newfound skills.


Arduino, Processing, getting started