
The Raspberry Pi is a small, single-board computer that is about the size of a deck of cards. It is a computer and not a microcontroller. You can connect a keyboard, mouse and monitor to a Raspberry Pi in the same way you might connect your desktop computer.
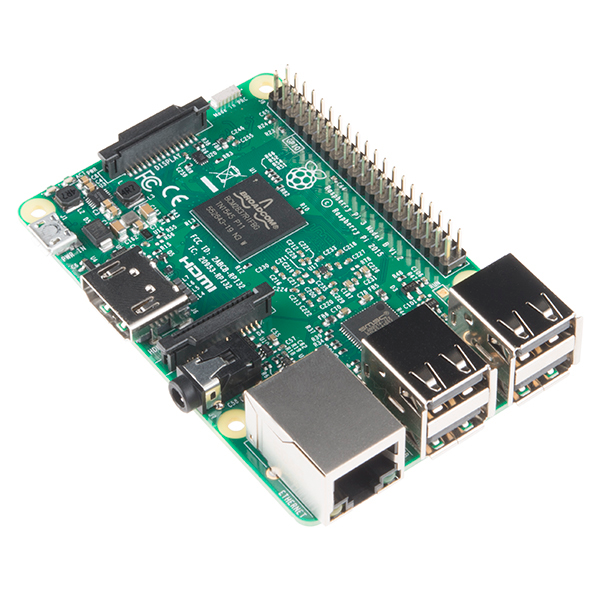
The Raspberry Pi computer has been out since 2012. The goal was to build a small form-factor computer that would be low-cost and accessible to the public. The first version of the Raspberry Pi was equipped with a standard RCA video connector so that it could be connected to just about any television set. One really nice thing about the Raspberry Pi is that it also has a bank of about 27 General Purpose Input / Output (GPIO) pins available for connecting to external LEDs, buttons and other sensors.
Recently, SparkFun Education was invited to lead a group of teachers through two days of Introduction to Raspberry Pi. As part of the preparation work, we developed this set of resources for getting started using the RPi to control the GPIO pins.
Classroom Resources:
These resources are designed to help support anyone who is looking to get started but is overwhelmed by the amount of information online. The ideas in these guides are attributed to the entire Raspberry Pi Foundation and the community of other fantastic developers supporting this effort. All I have done is clean up some of the documentation and simplified some of the drawings and illustrations. These are all shared as open/public Google docs. Please feel free to share, mix or remix these (with attribution).
Raspberry Pi Setup Guide
Setting up the Raspberry Pi, Installing NOOBs, configuring the Locale\Keyboard\WiFi settings and installing ScratchGPIO8 — an add-on to Scratch 1.4 that allows greater control of the GPIO pins.

Scratch + GPIO Control (Pi Wedge) Guide
This guide walks through using the features and functions in Scratch (1.4) or ScratchGPIO8 on the Raspberry Pi to control GPIO pins of the RPi. In this guide, we show all of the circuits using SparkFun's Pi Wedge breakout for the breadboard, but you can also use Female-to-Male jumpers and connect directly to the 40-pin GPIO header on the RPi.

Scratch & ExplorerHAT Guide
The team at PiMoroni developed one of the most full-featured hats for the Raspberry Pi called the ExplorerHAT Pro. Note: You must have the I2C interface enabled in order to use the ExplorerHat on the Raspberry Pi.
It features four built-in LEDs, eight onboard touch sensors (four of which have tabs that can be extended with alligator clips), four additional digital OUTPUTs, four digital inputs and four analog inputs. This is a guide that shows the commands and interface for using Scratch to read these sensors and control these outputs on the ExplorerHAT.

Raspberry Pi and Scratch Autostart Guide
Once you get your program doing the thing you want, you now need to figure out how to get the program to run headless. There are two files that you need to create — one is a shell script (.sh); the other is a desktop shortcut (.desktop). This guide shows you how to create those and where to save them so that Scratch autostarts when the RPi boots up. I've also included instructions here on how to kick off a Python script.

Python → GPIO Control (gpiozero) Guide
There are a few libraries available for controlling the GPIO pins in Python. The most popular and easiest to use is one called gpiozero. This reference guide walks through the various objects, methods and properties that are used in the gpiozero library. It also includes some basic examples of using gpiozero to set pins on or off or read the state of a pin.

Python & ExplorerHAT Guide
This complement to the Scratch & ExplorerHAT Guide describes the objects, methods and properties that are used in the ExplorerHAT library for Python. If you are using the latest version of NOOBs, the ExplorerHAT Python library is already installed. If not, to install this, open up a terminal and type: sudo apt-get install python3-explorerhat
In addition to these materials, if you're getting started with Raspberry Pi and want to learn more, the Raspberry Pi Foundation and Picademy offer some great resources.

teaching tools, Maker Education, python, programming, helpful information, raspberry pi