Teaching e-textiles can be a daunting task for educators new to the craft. We've compiled our top five tips and tricks to use while designing and facilitating a class or lesson around learning to sew with conductive thread and LilyPad sewable electronic pieces.
1. Choose an activity appropriate for your time frame and audience
Underestimating the time it takes to sew a project together can cause frustration and delays in a lesson plan, especially with a mixed skill-level audience. For an introductory e-textile project, a project using one LED and a battery is a great place to start, especially in a setting with time constraints or large crowds.
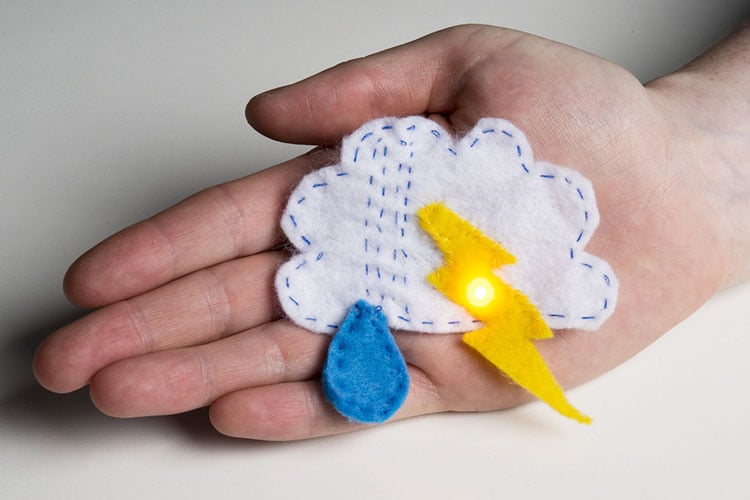
The Glowing Pin is a quick way to teach the fundamentals of e-sewing. Students can complete the project in as little as 15 minutes when following a template and using pre-cut fabric, or the activity can be expanded to a full 45-minute crafting session with the addition of circuit and aesthetic design prompts.
In this project, students create a light-up pin by sewing together a LilyPad Coin Cell Battery Holder and LilyPad LED with conductive thread. They then create a design with felt or a drawing on muslin (or other thin fabric) for the LED to shine through. Attaching a pin back makes this an instant wearable badge. Add variety for your students by letting them choose the color of the LED and customize the design to sew it onto.
Students already familiar with sewing may be able to start with an Illuminated Mask, which uses three LilyPad LEDs to create a wearable light-up costume accessory.
Looking for more project ideas?
- The downloadable LilyPad Sewable Electronics Kit Guide includes a sequence of four introductory projects with estimated timing and full-color instructions.
- Kylie Peppler’s book Soft Circuits: Crafting e-Fashion with DIY Electronics is a great resource for teachers, connecting a sequence of e-textile projects to Next Generation Science and Common Core State Standards with example lesson plans and teaching tips.
- LilyPad creator Leah Buechley's book Sew Electric includes projects using a variety of LilyPad pieces, from simple circuits to programming a LilyPad Arduino.
2. Provide example projects and inspiration
Help students visualize their project and kickstart the brainstorming process by offering a variety of demos to try out and pass around before the e-textile lesson begins. Build and display a few "in progress" demos that highlight key parts of the construction or concepts you will be presenting. When teaching basic stitching skills to beginners working with conductive thread, having a demo you can sew along with the student or use as a quick demonstration can prove invaluable.
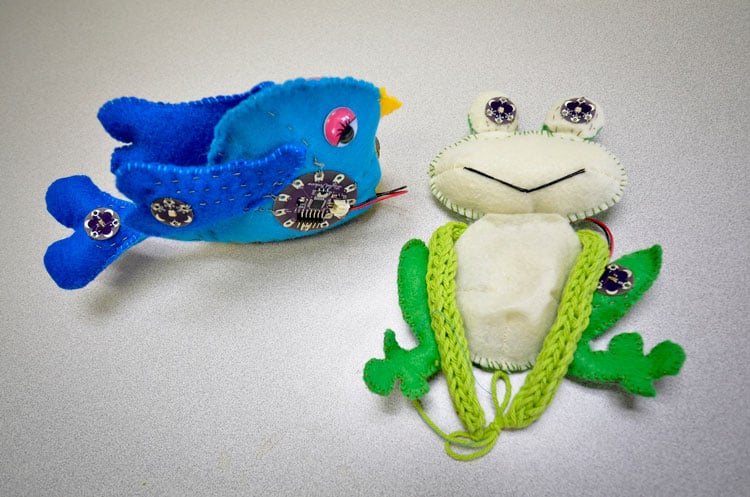
If unable to bring physical samples, compiling example photos within the scope of your lesson plan and using a digital presentation on a projector or screen is helpful. Be careful, though, as high-fashion or designer examples, while inspirational, are likely to be too advanced for new students and may result in project ideas that are not achievable with the materials or time allotted.
3. Prioritize planning and prototyping
Encourage students to design their circuit before sewing. Stitching a conductive circuit can be more time intensive when compared with breadboard or soldering projects, and stitches are more difficult to remove or reroute if placed incorrectly. Utilizing templates, patterns or open-ended worksheets enables students to identify any potential issues with their design and iterate before the final stitching process. It also allows for a quick check of the circuit before prototyping for scope and design issues.
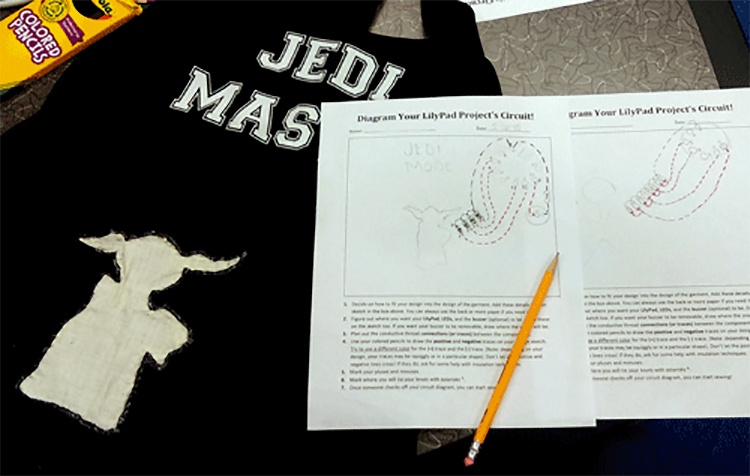
Planning a project using a LilyPad project worksheet created by the team at Creativity Labs
A few suggestions for project planning:
- Label the parts of the circuit and describe their function.
- Trace components (or print out photos of the board) to aid with placement and planning.
- Use different colors to highlight different types of planned connections — for example, red for stitching connecting the positive sew tab of a battery holder to the positive tab of an LED.
- Have students present projects to one another to double check their circuits' function and placement.
Get more tips on creating a successful project in the Planning a Wearable Electronics Project guide.
4. Test the circuit before sewing
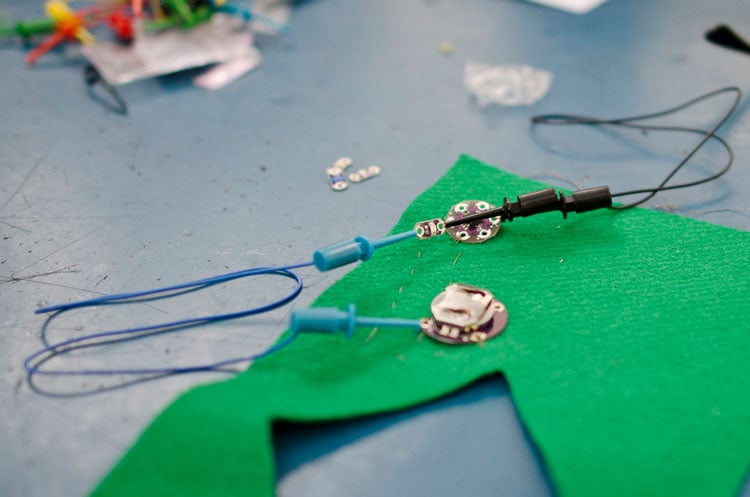
After students create a plan for their projects, have them test out the circuits by building a prototype with alligator clips or IC hook test leads before they begin the sewing process. Use the clips on the silver sew tabs to re-create the connections from their plans or drawings, making sure to power off or remove the battery from LilyPad boards before connecting.
If students are using a LilyPad Arduino in their projects, this step is a great time to review and refine code before final implementation. Code can also be refined after a project is stitched together for additional troubleshooting.
Even if students are using a pre-connected ProtoSnap board (LilyPad Development Board, LilyPad Development Board Simple, or LilyMini ProtoSnap) to plan and prototype their project, the act of physically connecting the boards with clips before sewing is still an important part of the learning process and helps reinforce the concepts of conductive thread circuit building.
5. Embrace opportunities for troubleshooting
As with any new skill, e-textile crafting has the potential to create some frustrations with projects that don't work right away or have hidden challenges. As students explore sewing with conductive thread, reframing failures as troubleshooting challenges can help push them to complete and rework a project instead of giving up on it.
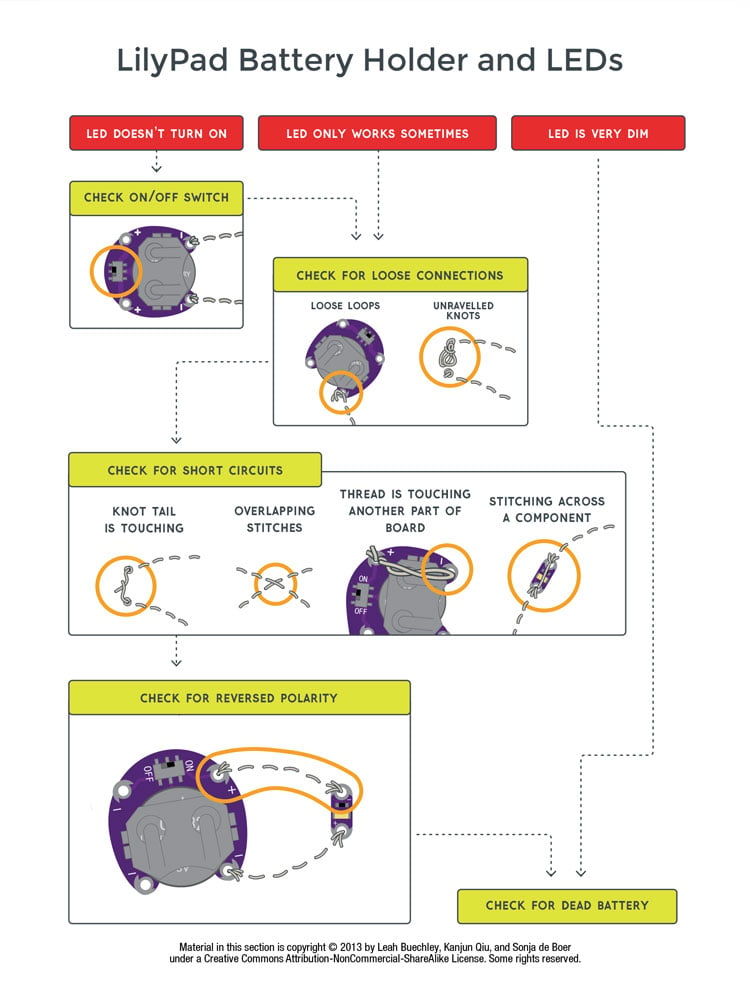 Page 73 of the LilyPad Sewable Electronics Guide covers common troubleshooting methods. View an online version in our LilyPad E-Sewing Basics tutorial.
Project troubleshooting usually falls into one of two categories: physical circuit issues or code issues. Of the two, the physical connections can be the most frustrating to students as they may require the removal of some conductive thread stitching or replacing LilyPad pieces. Debugging code and the programming side of a LilyPad Arduino project can often be done without any changes to the conductive thread circuit. When students encounter problems with the function of their project, working in teams can help alleviate some of the stress and encourage brainstorming around identifying problems and implementing solutions. Sharing your own challenges with building the demonstration projects or your own craft experiences can both aid your troubleshooting skillset as an educator and inspire students to work through their design challenges.
Tools to help with troubleshooting:
- Multimeter: For identifying short circuits or other electrical function issues.
- Hot glue gun: For quick fixes such as moving stray threads out of the way or insulation.
- Alligator clips: If a particular stretch of thread seems to be an issue, bypassing it by clipping LilyPad pieces directly together can help identify if the issue is in the way the thread is placed or if the components themselves are malfunctioning.
- Diagonal cutters: In instances where a component fails, students can carefully clip the sew tabs of the LilyPad piece and remove it without affecting the stitching. Place a new LilyPad piece in place of the old one and use some conductive thread to reattach to existing stitches.


teaching tools, Maker Education, e-textiles